Rockchip Batch Tool Prepare Idb Fail Rk3066
Aug 15, 2016 Used Rockchip Batch Tool V1.5 with kasty-arc97carbon-40-042-2G and clicked on Upgrade not Restore, which ended up with prepare 'idb fail' message. Unplugged device and rebooted it and it worked the same as before.
- 2Windows
- 2.1Install driver
- 2.2Flash Image
- 2.3Troubleshooting
- 3Linux
- 3.1Upgrade_tool from Rockchip
- 3.1.2Flash by partitions
- 3.4Troubleshooting
- 3.1Upgrade_tool from Rockchip
This page describes how to install an image to the nand flash of Radxa Rock, ie, how to flash the board. You can choose to either flash the whole nand image (ie, update.img) to the board or just flash the selected partitions. You can download the prebuilt images from our server or build your own images.
Before you start
Keep in mind that:
What you will need to flash the board is:
- Firmware image, check hardware revision. there are Pro and Full/Lite, firmware is different
- Radxa Rock or Rock Pro or Rock2 Square board
- a PC running Windows (XP 32/64bit, Windows 7 32/64 bit) or Linux (32/64bit)
- a micro USB cable with one side plugged in to the OTG port of the board and the other side plugged into the USB port on PC.
Windows
The Windows tool for flashing the image is provided by Rockchip. To flash the update.img(you'd better click this link and read this page,it's very Important for the radxa beginner), you need to use the RKBatchTool and to flash the partitions, you will need to use RKDevelopTool. Both RKBatchTool and RKDevelopTool rely on the RK USB driver so you will need to install it first as below:
Install driver
- install using RKDriverAssistant tools - the easy way(Just for winXp, Vista, Win7,not support Win8)
- install manually (WinXp,Vista,Win7,Win8)
If you have already installed the USB driver please skip this step.
a. Install using RK Driver Assistant tools
Note:The method just support WinXp,Vista,Win7, NOT SUPPORT Win8
There’s no need to connect your Rockchip device during this procedure just download and extract RKDriverAssistant.zipThen double click on DriverInstall.exe in the RKDriverAssistant directory to start the utility.If you've previously tried to install the Rockchip USB drivers for any Rockchip devices make sure you click “Uninstall Driver” first.
Then click “Install Driver” and when the driver has finish installing then shut down radxa board and connect the Radxa Rock board to your computer and let the board go to loader mode, then your computer will detect the board and you will see it within device manager.
Now the driver should have been installed successfully!
b. Install Manually
Download driver file first. For WinXp,Vista,Win7,Download the file (usb_driver_v3.5.zip) from here . For Win8 Download the file(usb_driver_v3.7.zip) from here. shut down the Radxa Rock board then connect the Radxa Rock board to the computer and let the board go to loader mode. After your computer should detect the board and you will see an unknown device within device manager.
Select the Unknown device then right click and select 'Update Driver Software'.
Select 'Browse the computer for driver software'.
Find the file unzipped file you downloaded earlier (usb_driver_v3.5.zip) and select either the 32/64bit folder then click 'OK' to install.
When the driver is installed successful you will then see a Rockusb Device in the device manager window.
Now the driver is installed successfully.
Flash Image
Download the tool first AndroidTool_Release_v2.71.zip
There are two methods to flash an image.
- Flash the whole firmware only, it will erase everything.
- Flash firmware by partitions, it's very convenient when debugging part function such as kernel
Flash the whole firmware
Power down the Radxa Rock board and connect the Radxa Rock board to the computer then let the board go to loader mode after the program should detect the device.
you can see “Found One MASKROM device “ at the bottom of the tool when you first flash the board or just unbrick the board
Or “Found One Loader Device” at the bottom of the tool when you flashed image not first time
Then Select an image (rockdev/update.img). For information on how to make nand image see update.img
After that, Click 'Upgrade ' to begin flashing
Flash firmware by partitions
Power down the Radxa Rock board and connect the Radxa Rock board to the computer then let the board go to loader mode after the program should detect the device.
you can see “Found One MASKROM device “ at the bottom of the tool when you first flash the board or just unbrick the board
Or “Found One Loader Device” at the bottom of the tool when you flashed image not first time.
Then select the partitions you need update, and select the right image which you can find under rockdev or kernel directory. finally click 'Run ' to flash
Note: if your address of the partitions doesn't the same as the pic below, you can modify the address by click the address item.
Here is the video you can refer
Troubleshooting
FlashTool can not recognize the board
This often happened by the follow reasons:
1) Not enter the loader mode (refer to [rock loader mode] [rock2 square loader mode])
Note:
In general, When you connect to PC with radxa( in loader mode), the PC can recongize radxa as Rockusb Device(windows)
2) the used usb port of pc is usb3.0 (please change usb2.0 port)
3) the OS of PC is windows 8 (if windows 8,please use http://dl.radxa.com/rock/tools/windows/Rockusb%20Driver%20v3.7.zip)
4) bad quality usb cable, you can change a short and good quality one to try again
If the problem still exists, you can refer to the topics in talk.radxa.com, create a new topic on it or send email to support@radxa.com
Flashing failed
For rock pro
After flashing, the uart print
and not boot.
If flashing failed, try to format the nand flash before flashing it.
- AndroidTool V2.3 -> Upgrade firmware - click 'Erease Flash' button to format the nand flash
- AndroidTool V2.3 -> Download Image - click 'LowerFormat' to format the nand flash
For rock2 square
you can press reset key and reflash , if still failed ,you can refer to http://talk.radxa.com/topic/957/bricked-rock2/19 or send mail to support@radxa.com
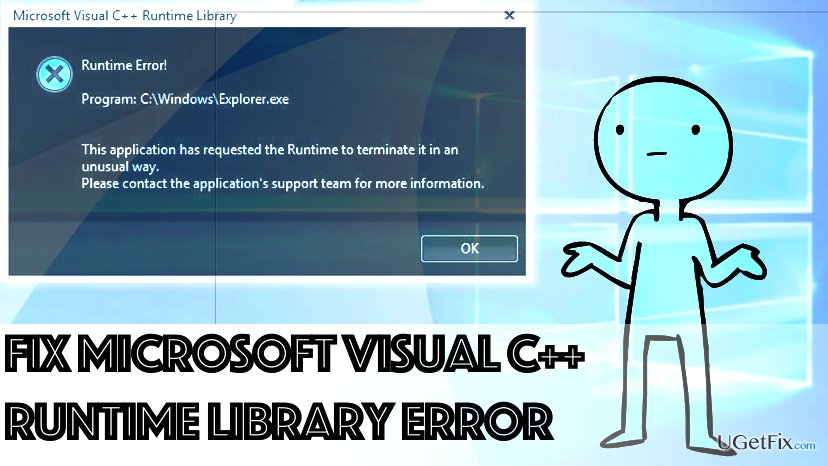
Preparing IDB failed
This happens at upgrading bootloader, if you need to upgrade the bootloader or the update.img contains a new bootloader, you probably will meet this. The rock is 'bricked'. Follow this unbrick instructions to unbrick it.
Win8.1 and USB 3.0
If you have problem with Win8.1 and USB 3.0, please check:http://talk.radxa.com/topic/1026/solution-rk-batchtool-problem-with-64bit-windows-8-1-usb3
Linux
Rockchip has provided tools for upgrading within Linux (closed source) since Android 4.4. It's called upgrade_tool.It supports update.img, parameter, bootloader and other partitions, and it's command line based.
rkflashkit is an open source GUI version flashing tool for rockchip devices. It can not flash bootloader or parameter, only supports kernel and other partitions, but it supports backup the partitions.
For developers:The initial RE work of the Rockchip bootloader updating protocol is by naobsd and has been improved by some in rkflashtool. linuxerwang has made a GUI version of the rkflashtool called rkflashkit. Please note: both rkflashtool and rkflashkit can not flash the rock/update.img and can only flash within rock/bootloader mode and not rock/mask rom mode because the rock/mask rom updating protocol is not RE yet. If you are interested in the RE protocol ping naobsd at #radxa on IRC. Since the rock/bootloader has remained unchanged for a long time it's enough for normal usage. If you don't know what this means, just ignore it.
Upgrade_tool from Rockchip
Download the Rockchip linux upgrade tool here. Unzip it and you will get a file called upgrade_tool which is a binary executable file under Linux.
Note: there are two ways to flash the android image.
1> Just flash one image file. refer to the 'Flash update.img' ,The image you can download here prebuilt_image . or you can build the image by yourself refer to Android_Build
2>Flash image by partitions,this methods you need flash serveral images depends on the partitions and your requirement. refer to 'Flash parameter ', 'Flash bootloader ','Flash the kernel(boot.img)'

Flash all-in-one nand/emmc image file(Recommended)
Let the board go to loader mode [Rock Loader mode], [Rock2 Square Loader mode] and run the following command to flash the update.img:
If you have an error with upgrading you can low level format the nand flash first with the following command:
Flash by partitions
The whole files you should flash are'parameter','bootloader','boot.img','recovery.img'system.img' , all the file you can find under the rockdev/ after you build the android successful.
How to flash the file and images.
Flash bootloader
Other partitions can be flashed by di command. You can use upgrade_tool di partition_name image_name to flash the image to the partition. There are some shortcuts for certain image name.
| partition name | short name |
|---|---|
| parameter | -p |
| boot | -b |
| system | -s |
| recovery | -r |
| misc | -m |
Flash parameter
or for short
Flash the kernel(boot.img)
or for short
Flash the rootfs
Others
There are other commands in the upgrade_tool, such as:
FAQ
1) why I must flash this file?
The android image is constructed by this files.
2)what's the paration info?
The partations info you can get from the paramteter file under the rockdev/ which in the android source code.
3) why other parations do have image to flash?
Other parations are used to store data.
4) why not flash the kernel.img ?
The kernel.img is packed into boot.img . more info you can refer to Android_Build
5) Other questions
Post on the talk.radxa.com or send email to support@radxa.com
Flash with rkflashtool(Advanced)
rkflashtool is an open source tool to write nand flash via the loader mode for rockchip platform.
To install rkflashtool:
To read/write parameter:
To read/write partitions:
Rkflashkit with GUI
You can download the pre-built rkflashkit here or build it yourself with the following command:
And install it with the following command
Run it with the following command
You can see the interface looks like this:
Connect the Radxa Rock board to the computer and let the board go into loader mode you will then see the the program detect the board in loader mode.
- Click the Nand partition and you will see the partitions of the board listed then choose the one you want to flash.
- Choose the location of the image you want to flash to that partition.
- Click the 'Flash image' button and it will start flashing
- After it's finished click 'Reboot Device' button to reboot the board.
Top 20 Free NI Kontakt Libraries In 2020 - Free Orchestra, Guitars, Pianos, Vocal, World Instruments In this article I’m going to list 5 great sources of free Kontakt instruments. These libraries will not only work in orchestral scoring - you can easily use them in electronic music or any other genre. Smolken’s Double Bass for Kontakt – Double bass for Kontakt made by Bigcat Instruments using D. Smolken’s samples. Bigcat Saxophone Collection (6) – Saxophones for Kontakt made by Bigcat Instruments. Kontakt guitar rig. Pettinhouse is a project by Andrea Pettinao. On his site, he not only offers about a dozen guitar, bass and drum sample libraries, he has also released free versions of many of his products. This Free DirectBass 2.0 is taken from his DirectBass 2.0 library and recreates a Yamaha TRB 5 string bass guitar. SCARBEE JAY-BASS is the go-to source for slap and finger bass. This addition to the 'powered by KONTAKT' range of instruments is an expertly played and sampled late 70s Jazz bass. Created by Thomas Skarbye. Based on the Scarbee Red Bass, it makes extensive use of the advanced scripting features introduced with the SCARBEE PRE-BASS. With three pick-up positions and a multitude of playing techniques, SCARBEE JAY-BASS has it all when it comes to slapped and fingered bass sounds. With KONTAKT 6, you can sound like a snare drum, a symphony orchestra, or anything in between, from a universe of sampled instruments. It’s a simple sampler when you want it to be, and a deep sonic scripting laboratory when you need something more.
Troubleshooting
Creating Comm Object failed!
that's udev issues… You can solve this by creating a new file in /etc/udev/rules.d/ with the rule for the rock.
To do that, copy and paste these commands:
Finally, just remove and reinsert the USB cable.
What's verision of My board and Which Image should I flash!
refer to update.img
Install the image on RR without PC
If you want to write the image on RR without any other host PC, you can download the image and write with dd:
Videos tutorial
- Flashing the image to nand flash https://www.youtube.com/watch?v=r20lOKu2E1s&feature=youtu.be
External Reference
This is my first thread on Rikomagic forums, so greetings to all of you!
I am here for help.
My device:
Rikomagic MK 802 IIIS mini PC with the following specs:
Model MK802 IIIS 8GB Dual Core
CPU RK3066 Dual Core - Cortex-A9 Up to 1.6GHz
GPU Quad- Core 2D/ 3D/ OpenGL ES2.0(AMD Z430)/ OpenVG1
OS Android 4.1
RAM 1GB DDR3
Memory 8GB Flash
Expansion Micro SD T-Flash(Maximum support 32GB)
Video Format WMV/ASF/MP4/3GP/3G2M4V/AVI/MJPEG/RV10/DivX/VC-1/MPEG-2/MPEG-4/H.263/H.264/1280*720P HD 30 fps, 1080P/720*480 D1 30fps
Audio Format MP3/WMA/APE/FLAC/AAC/OGG/AC3/WAV
Picture format Max.8000x8000 JPEG BMP GIF PNG
WiFi 802.11 b/g/n
Flash Supports flash 11.1
HDMI(male),Micro SD slot, USB host*1,USB OTG*1, USB power port; LED(Blue)
I managed to severely brick this MK802 IIIS mini-pc.
What I did to brick it?
On short: After trying to restore a full NAND backup (8 GB containing Android factory installation) with Linux program rkflashtool, although there were no errors displayed during restore operation, the device does not boot anymore.
The full story here: http://forum.xda-developers.com/showthr .. ?t=2335535 (see the post titled 'Very frustrating: seems that rkflashtool restore isn't working on Rikomagic MK802IIIS' and the next one)
What I've tried for recovering the non-bootable MK802 IIIS?
I tried with NO success the following Windows programs in a vmware XPsp3 virtual machine:
- RK Batch tool 1.5
- RK Batch tool 1.7
- RK Android tool, various version that come with custom ROMs such as Finless ROM and NeoTV ROM
NOTE I
 (about virtualized environment): Before this last severe brickage, I was able to recover my device using RK Batch Tool 1.5 in a XP virtual machine on vmware
NOTE II (about preparations): WinXP manual driver installation went OK, and before each recovery attempt I put the device in flashing mode by powering up through OTG miniUSB while holding the reset button pressed with a paperclip, for 5-6 seconds. So I did my best to execute every step as the documentation required.
How the recovery attempts fail?
Here comes description of the behaviour I got from the tested utilities:
1)RK Batch tool 1.5 / 1.7: both versions behave the same: when I connect the device, the box 1 turns to blue (not green). Now:
- when I try to upgrade to stock firmware (pressing 'Upgrade' button), the operations run fine until the download firmware step. The download starts normal, and the progress runs in normal 'rhythm' until about 9%. When it reaches 9%, the download rhythm 'accelerates', meaning that it starts to count the progress quickly, from 10% to 100%(it reaches 100% in seconds). At 100%, it reports: 'Download firmware failed'.
If I re-plug the device imediately after this operation, the box 1 turns green as it should be. BUT, if I attempt the upgrade again, it stops at 'Waiting for loader' step.
Then, if I attempt to replug again, the box 1 is again blue.
- when I try the recovery option (pressing 'Recover' button), it starts to do the recovery (it executes OK some steps, such as checking device, resetting device, doing lowerlevel format), but at the 2nd device reset, it stops at 'Waiting for loader'.
If I try to replug, the box 1 stays blue.
2) RK Android Tool: (tested with various versions) sees the newly connected device in 'Loader mode'. Now:
- When I try to install everything(loader, boot, kernel, system), it executes some of the steps (checking device, lowerformat, resetting), but it fails at downloading firmware (in the same manner as RKBatchTool). The device reboots in 'Loader mode' again, no matter if I press the reset tiny button or not (I tested both scenarios).
- If I click on 'Erase IDB', the operation completes successfully, and device reboots in 'Maskrom mode'. But if I try again to install everything, it fails and it reboots in 'Maskrom mode' again. Maskrom mode is undesirable because in this state (I guess because it lacks a loader) it doesn't even try to flash the firmware, instead it fails on resetting device.
- RK Android tool gives me success if I install only a minimal set (loader+parameters), but this does not help me, because the device is not booting with this minimal set. However it boots in 'Loader mode' again (better than 'Maskrom mode').
NOTE I: Yes, I have tried several combinations of RKBatchTool + RKAndroidTool, for example: 1)erasing IDB in RKAndroid and then re-connect in RKBatch to do upgrade/recovery, or 2)Attempting to install each separate component in RKAndroid Tool), but with NO SUCCESS.
NOTE II: I even re-tried to restore once again my 8GB NAND backup using rkflashtool for Linux, but with NO success.
Conclusions and questions
So, to put it short: The conventional recovery methods for MK802 IIIS are not working for me.
I have strong reasons to think that, when I used Linux rkflashtool to write ALL my 8GB NAND, some protected data portion on the NAND was corrupted(overwritten with bad data). It is so badly corrupted that common re-flashing utilities (which, I suppose, expect to find a partition table to work on) are failling.
NOTE(about hardware status): Based on my observations and tests results, I think the hardware (excluding NAND) is fully functional: the miniUSB (OTG and DC) ports are both working and the device receives power. The blue led on the device turns on every time I power it up. Also, the device manages to get in the flashing mode, it is recognized and displayed by the recovery software everytime. As I said above, during recovery operations, device is tested, resetted, CPU checked and identified. All these prerequisite checkings are reporting status OK. I think the brickeage root cause is merely a NAND data corruption of my MK802 IIIS.
Therefore my main question: Is there a stronger method to reset NAND and re-flash the Rikomagic MK802 IIIS ?
By 'stronger', I mean some hardware reset procedure, by short circuiting pins on NAND chip, like the one briefly mentioned here for MK808 model: http://www.slatedroid.com/topic/69561-rk3066-recovery/
Is there anything similar for MK802 IIIS? If yes, can someone write which pins on the NAND must be shorted and which is the sequence of operations?
Any suggestion or advice will be VERY appreciated!
Thank you in advance.
RikoBricker
PS / INFO: I posted my story (with minor differences in phrasing and formatting) on two other forums too:
http://www.slatedroid.com/topic/82233-i .. is-device/ (it contains a high-res picture of my MK802IIIS' NAND chip)
http://www.flashmyandroid.com/forum/sho .. MK802-IIIS (it also has the attached pic)
But I haven't received any answers so far.